The Time Entry area in PaSTA allows users to record and submit actual work hours that integrate directly with their organization’s external timekeeping system. When time is submitted in PaSTA, it communicates with that external system to upload all recorded hours. After the external system processes the data, the confirmed hours are pushed back into PaSTA for review.
Convert scheduled hours: If the person entering time was assigned hours on the Schedule tab, those hours can be copied into the Time Entry tab for review and submission.
Manually add hours to Time Entry: If the schedule grid was not used to assign personnel to work orders, users will need to manually add their actual hours to the time entry.
Note: Entering unavailable time follows the same steps as outlined below, but is completed in the Unavailable Time tab rather than the Work Orders tab.
Convert Scheduled Hours:
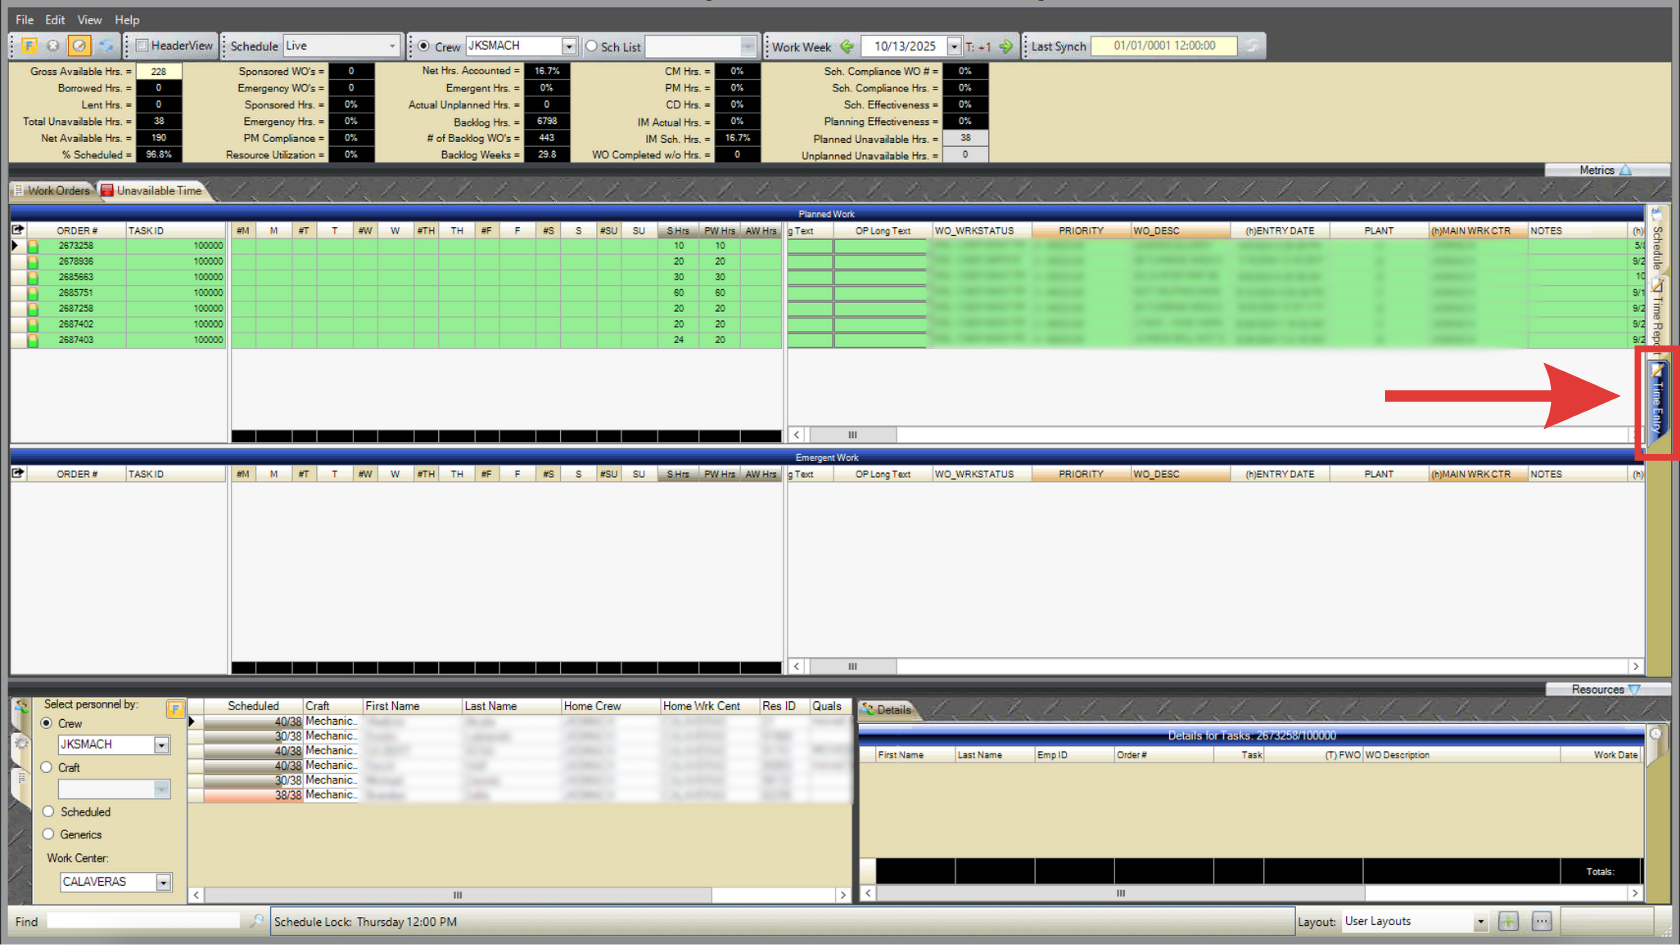
- Open the Time Entry tab.
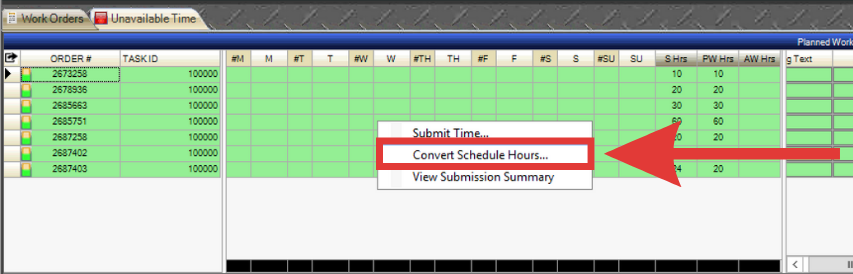
- Right-click in the schedule grid and select Convert Schedule Hours.

- If entering unavailable time, perform this step from the Unavailable Time tab instead of the Work Orders tab.
- Note: Generic entries cannot be converted.
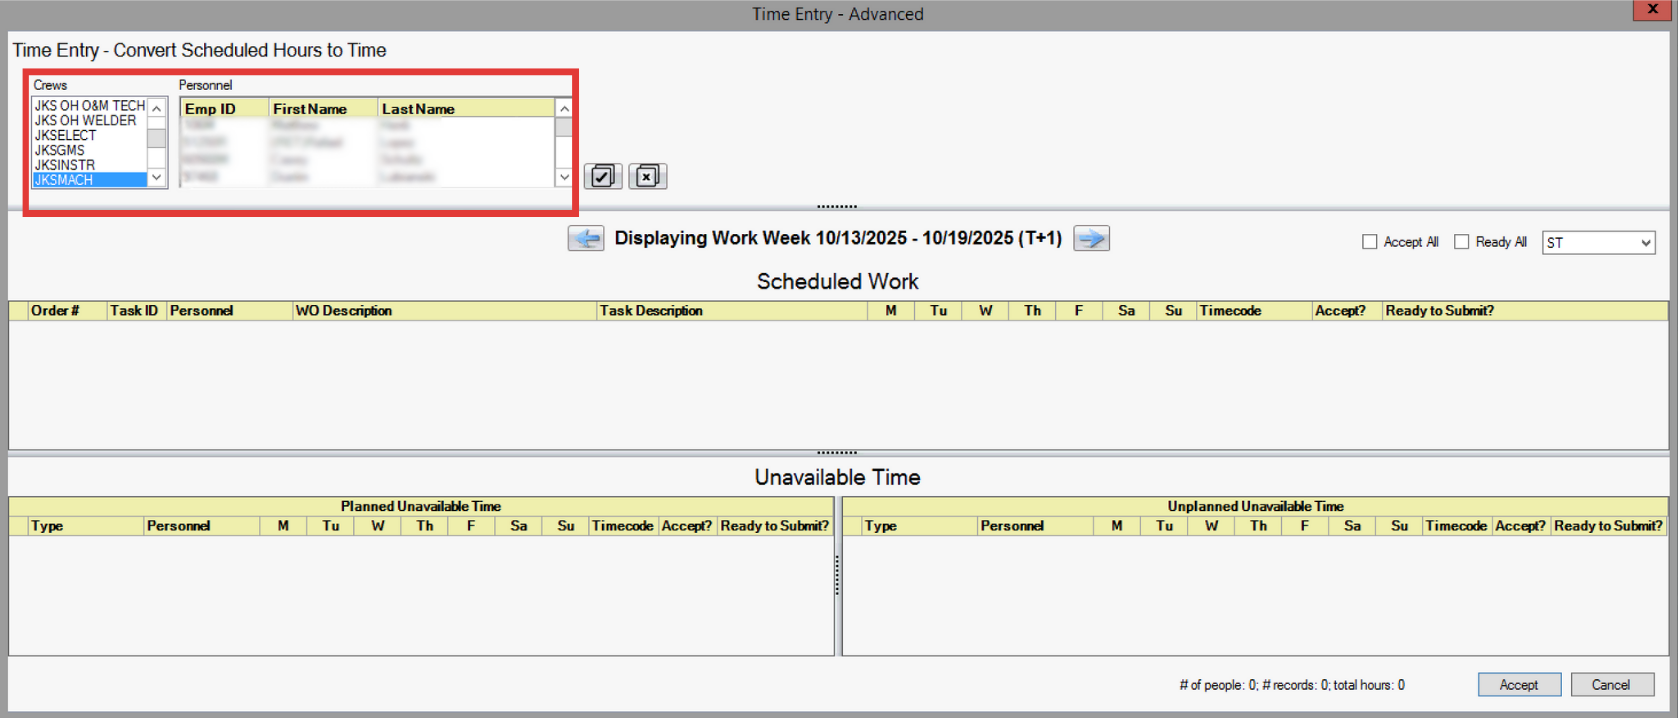
- Select the applicable Crew/Personnel.
- Note: Most users will only see their name populated and will not have permissions to select more crew/personnel. Permissions may be edited by admin. Learn more here.
- To select multiple, hold the Ctrl key. To select all, click the check mark button.
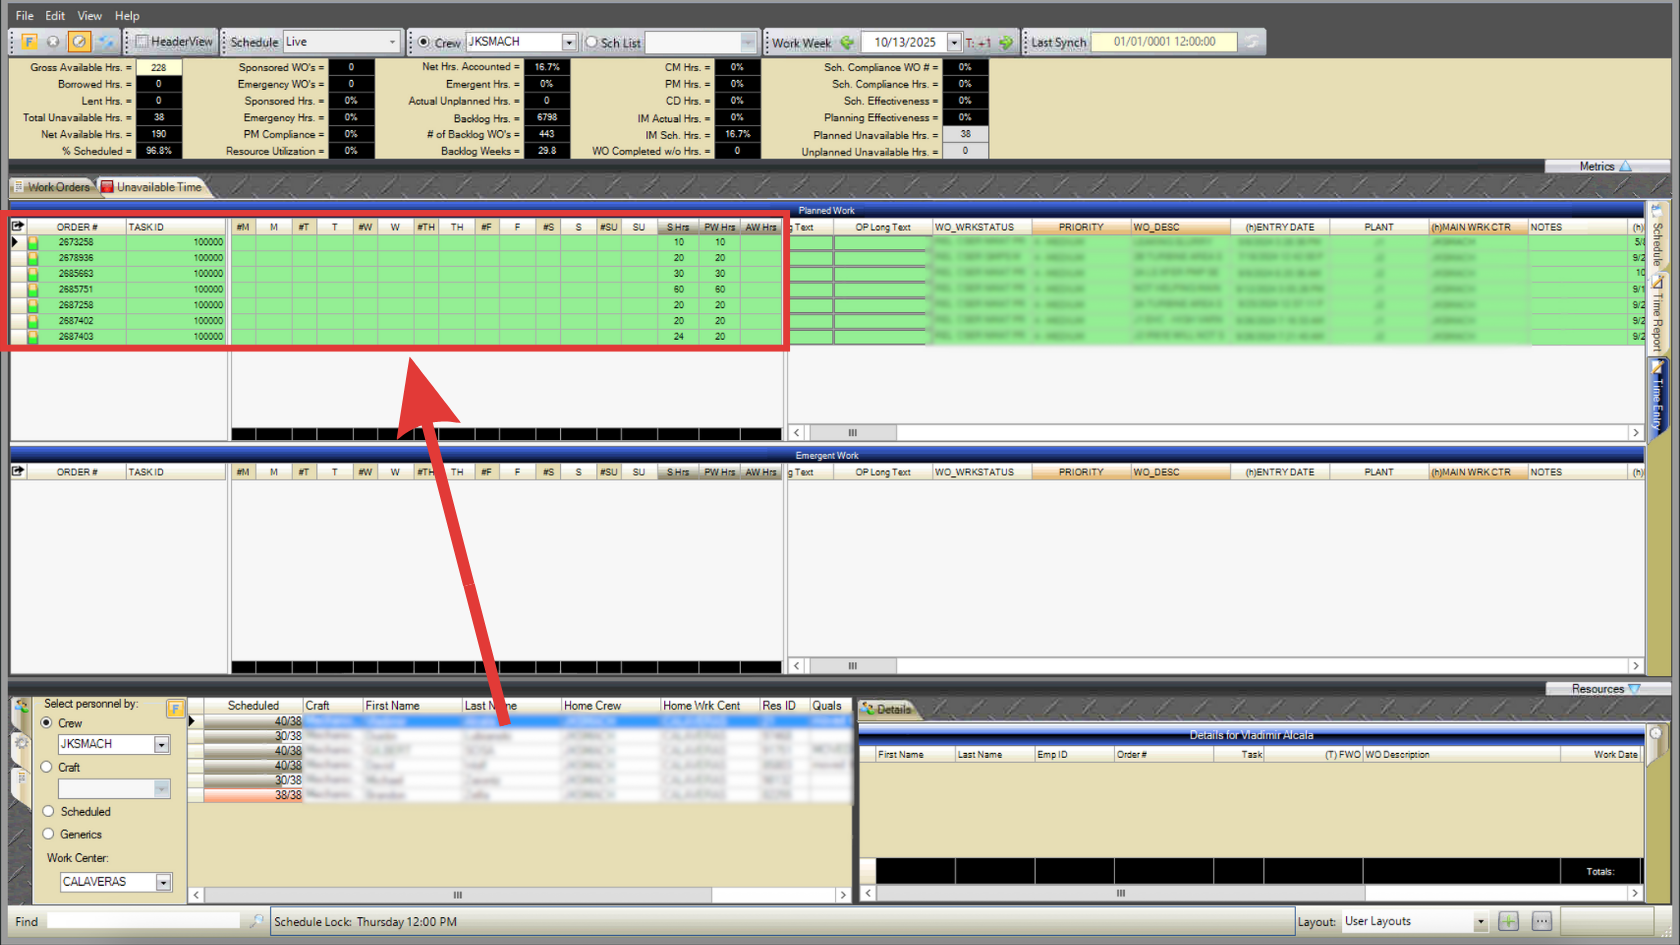
- Review the work orders displayed under Scheduled Work.
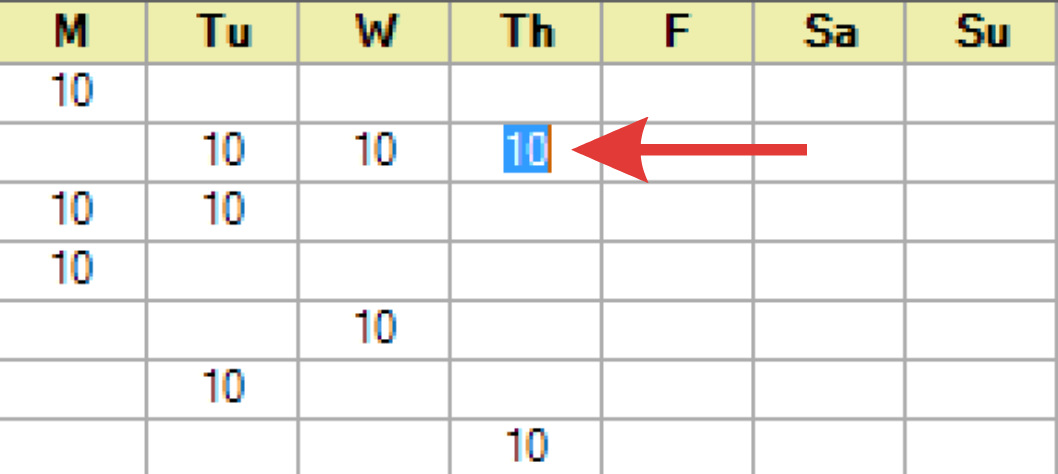
- Double click a cell to edit the hours (if applicable).
- Note: If the user has already accepted some of the scheduled hours, they cannot be edited in this grid. Previously accepted hours are red.
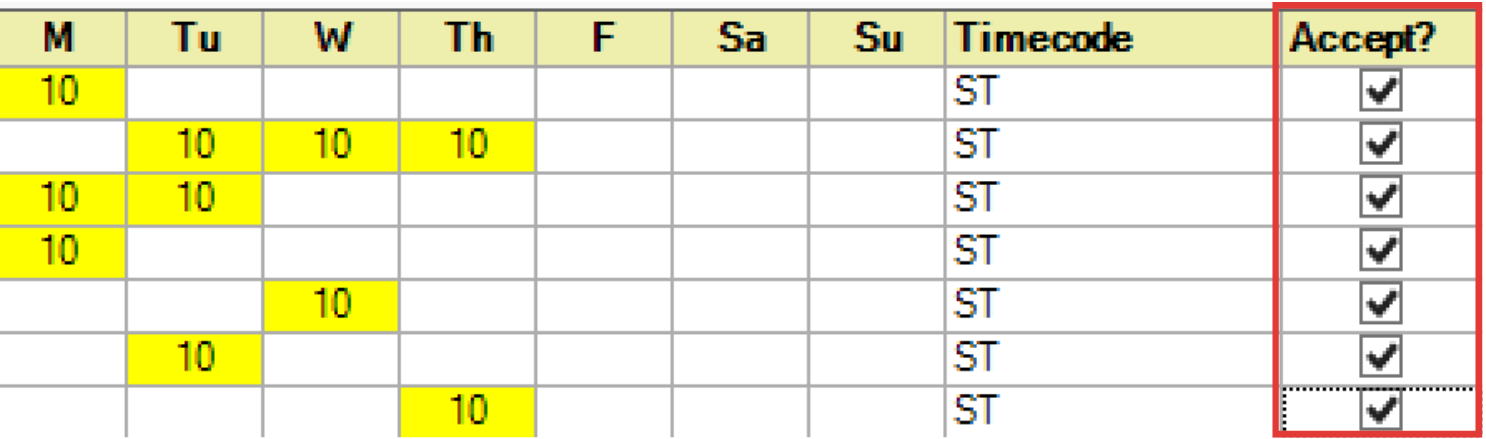
- Once hours are edited, click the Accept button for applicable work orders (or click accept all).
- Accepted hours are highlighted yellow.
- Click the Ready to Submit button for applicable work orders (or click ready all).
- Click Accept in the bottom right. You are now ready to submit time.
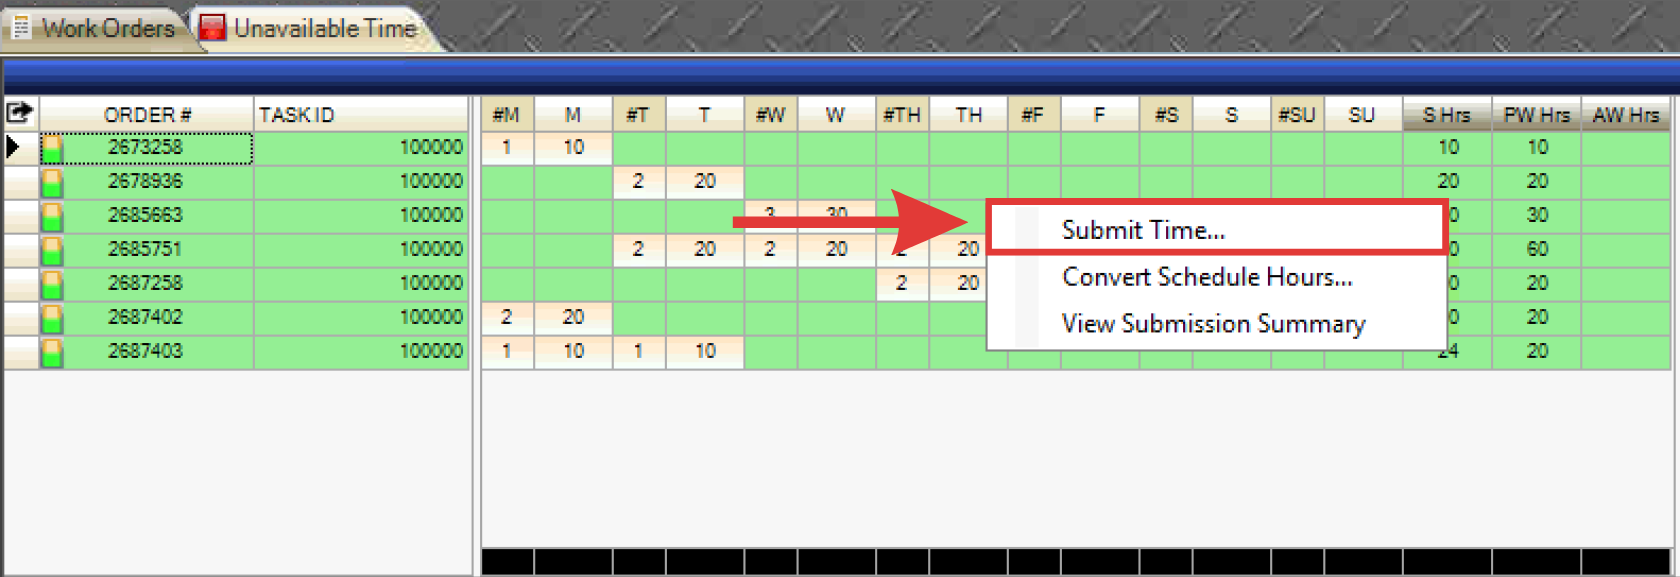
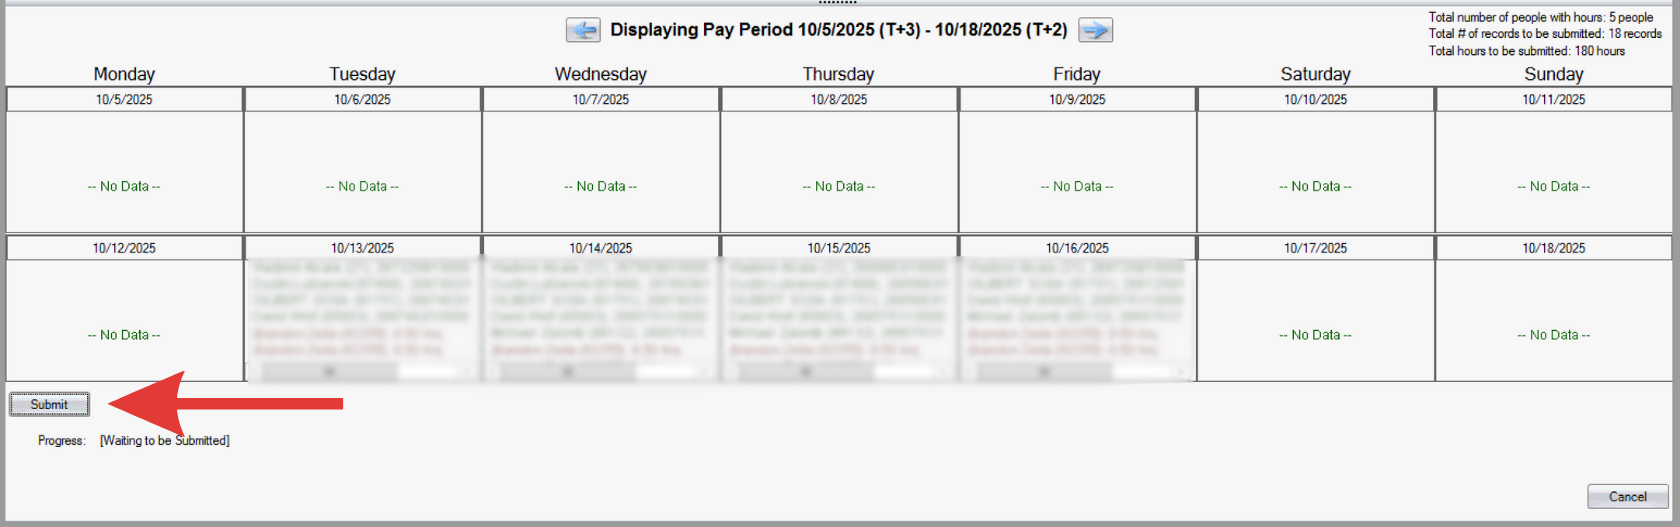
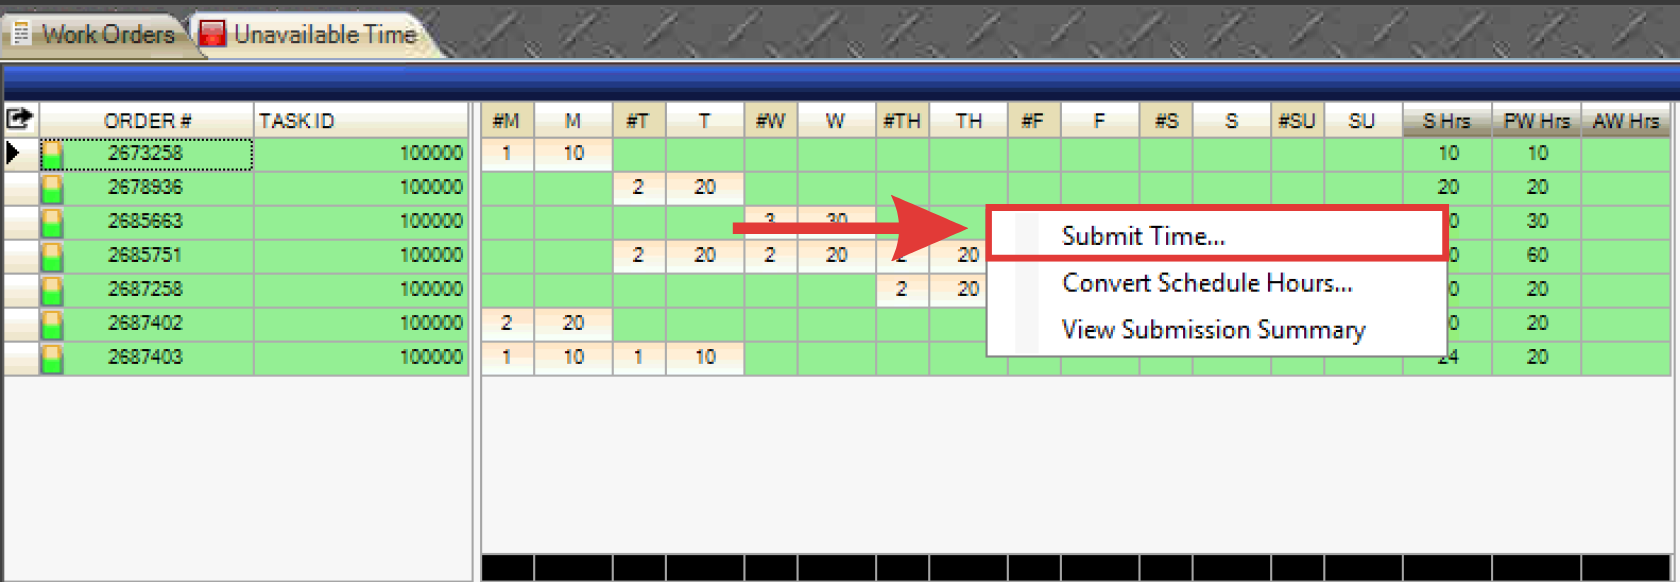
- Right-click in the schedule grid and select Submit Time.
- If entering unavailable time, perform this step from the Unavailable Time tab instead of the Work Orders tab.
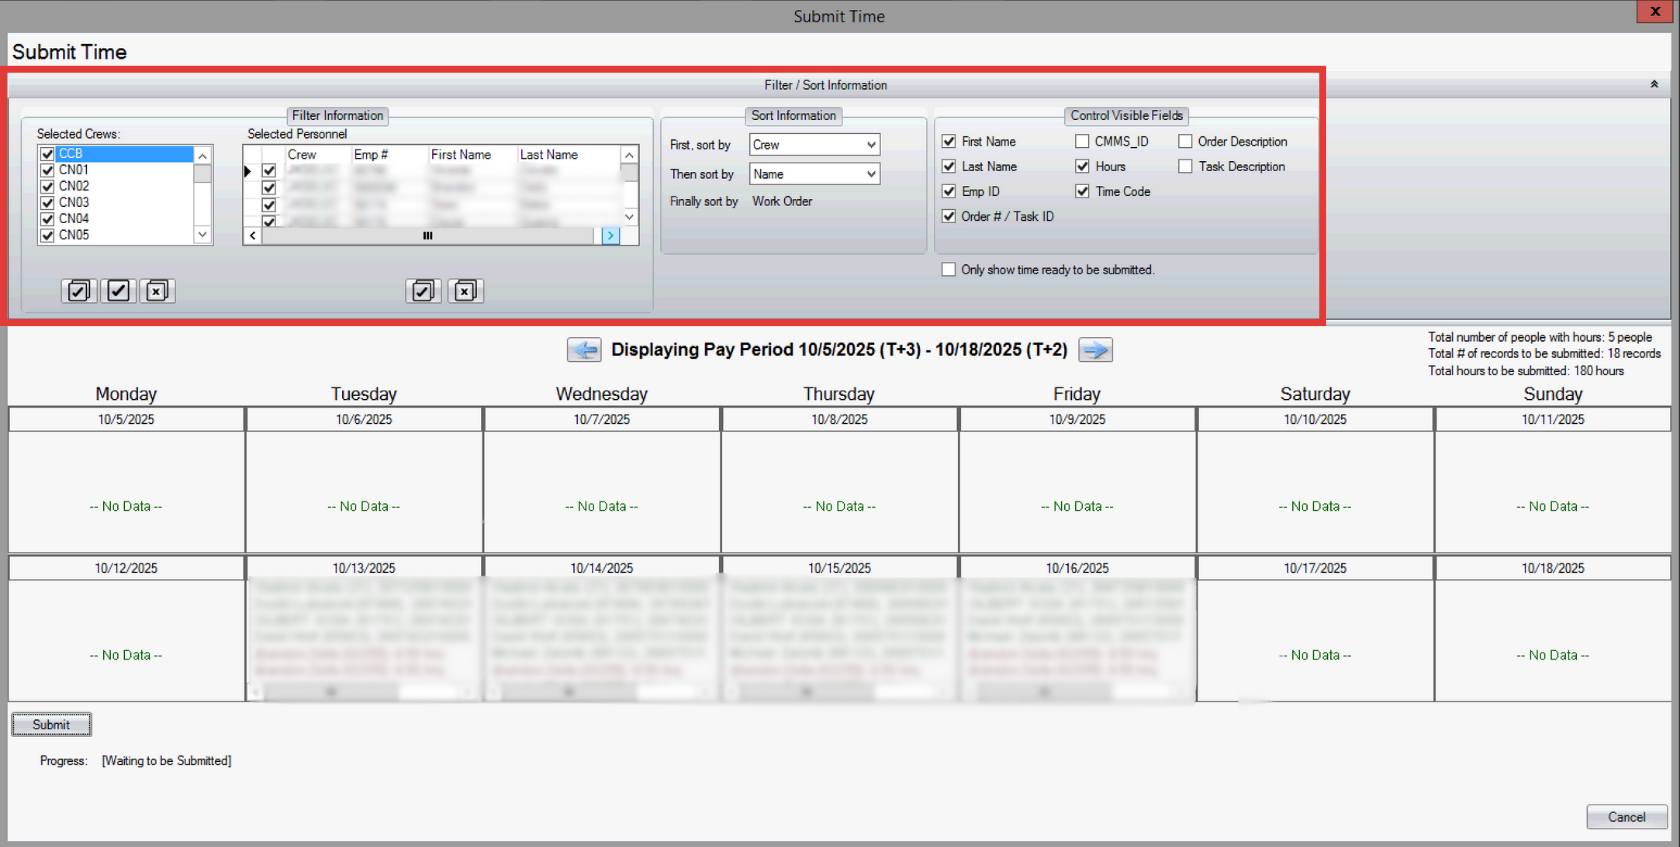
- Filter for desired crews and/or personnel, sort information, and toggle visible fields to be displayed.
- Review the work orders displayed in the calendar and select submit.
- Work orders highlighted in red represent unavailable hours.
- Unavailable time entries appear in italics.


Manually Add Hours to Time Entry:
- Open the Time Entry grid.
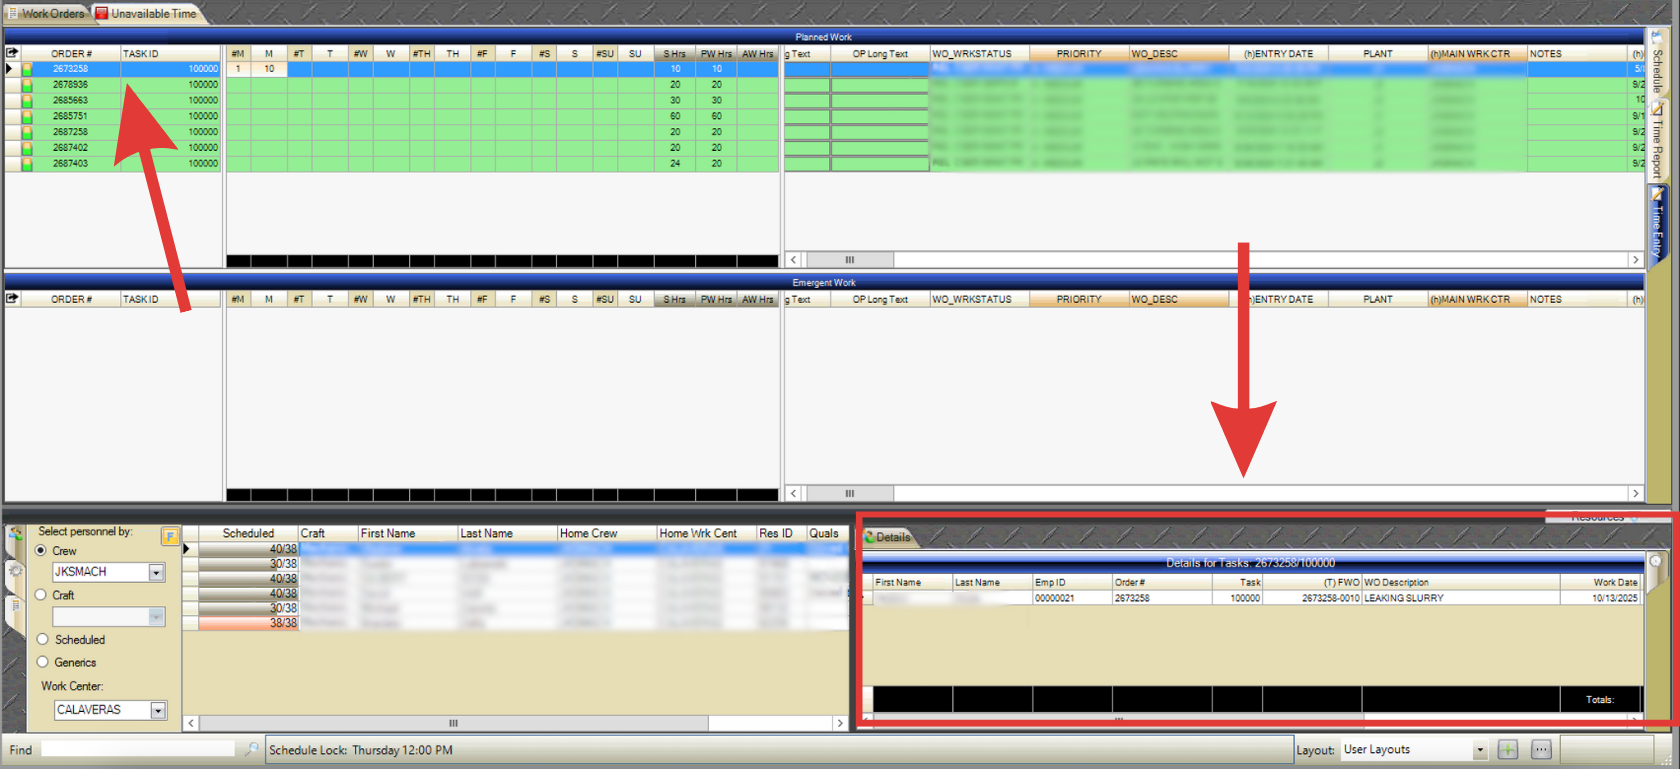
- Select a personnel from the task tab on the bottom left.
- Click and drag the individual to their respective work order on the applicable day.
- If entering unavailable time, perform this step from the Unavailable Time tab instead of the Work Orders tab.
- Note: User permissions restrict most individuals to selecting only their own profiles. Any attempt to click and drag another user will trigger an error message. Permissions may be edited by admin. Learn more here.
- The Time Entry dialog box appears. Adjust hours and time code as necessary.
- If multiple pay codes are required, users can add an additional entry on the same day/work order. To add another entry, click the green plus button in the bottom left corner.
- Click Accept when finished.
- Select the work order on the schedule grid and the accepted hours will appear in the bottom right corner of the screen.
- If entering unavailable time, perform this step from the Unavailable Time tab instead of the Work Orders tab.
- Use the slider to scroll to the end of the work order and select the check box under Ready to submit.
- Right-click in the schedule grid and select Submit Time.
- If entering unavailable time, perform this step from the Unavailable Time tab instead of the Work Orders tab.
- Filter for desired crews and/or personnel, sort information, and toggle visible fields to be displayed.
- Review the work orders displayed in the calendar and select submit.
- Work orders highlighted in red represent unavailable hours.
- Unavailable time entries appear in italics.