Menu

File
- Find: Opens the Work Orders Search screen to filter and locate specific work orders.
- Print: Generates standard WWS reports in PDF format.
- Work Tasklist – <Daily>: Crew schedule report of the work schedule by day.
- Crew Tasklist – <Daily>: Crew schedule report of personnel assigned to the work schedule by day.
- Personnel Tasklist – <Daily>: Personnel schedule report assigned to the work schedule by day.
- Work Week Schedule: Consolidated report of metrics, work schedule, emergent work, and unavailable time.
- Planned Work: Crew schedule report of the planned work for the week.
- Emergent Work: Crew schedule report of the emergency and sponsored work for the week.
- Work Week Gantt: Customizable work week gantt report for any number of crews and with defined start and stop dates.
- Planned Unavailable Time: Report for planned unavailable crew hours for the week.
- Unplanned Unavailable Time: Report for unplanned unavailable crew hours for the week.
- Email Reports: Automates report distribution by sending scheduled reports directly to selected recipients.
- Custom Reports: Customer-specific reports.
- Time Report: Actual hours report of personnel assigned to the work schedule by day.
- All Crew Tasklists by Day: Report of all crews assigned to the work schedule by day.
- Modify Reports: Modify canned WWS reports.
- Export: Export WWS data for use outside of PaSTA.
- Export Work Tasks: Exports the currently displayed work task records and their associated data.
- Export Resource details: Exports data related to the resources scheduled to work orders.
- Export to DBase III: Export data to a DBase III (.dbf) file format.
- Export Time Entries: Exports recorded time entry data associated with work tasks and resources.
- Close: Close the WWS.
Edit
- Reset User Layouts to Default: Resets screen layout to the global default.
- Set User Layouts as Default: Set your layout as the the default for the center (only authorized users).
- Reset Default Layouts for Center: Reset screen layout for the center back to the original defaults (only authorized users).
View
- Increase Metrics Font Size: Increases the font size in the metrics panel.
- Decrease Metrics Font Size: Decreases the font size in the metrics panel.
- Show/Hide Time Report Indicators: Toggles time report indicators.
- Show/Hide Multiple Crew Scheduled Indicators: Toggles indicators for tasks scheduled to multiple crews.
Help
- Legend: Displays the WWS color legend. These row color definitions reflect the default settings and may be customized by your organization.
- Planner not assigned: No planner assigned in PaSTA or through the CMMS interface.
- Planner Assigned. Planning not complete: Planner assigned, but not set to Planning Complete in PaSTA or not in a Planning Complete status in the CMMS.
- Planning Complete. Not Ready to Work: Planning activities complete, but not marked Ready to Work by a supervisor.
- Ready to work: Marked Ready to Work by a supervisor.
- Hold: Job is on hold (LOTO, clearance required, etc).
- Note: Job has a note attached (dog ear symbol).
- Current work week or later: Scheduled in the current or future week.
- Before current work week: Scheduled in a past week.
- Both before and after current work week: Scheduled in both a past and a current or future week.
- On a project: Job is part of a project.
Toolbar
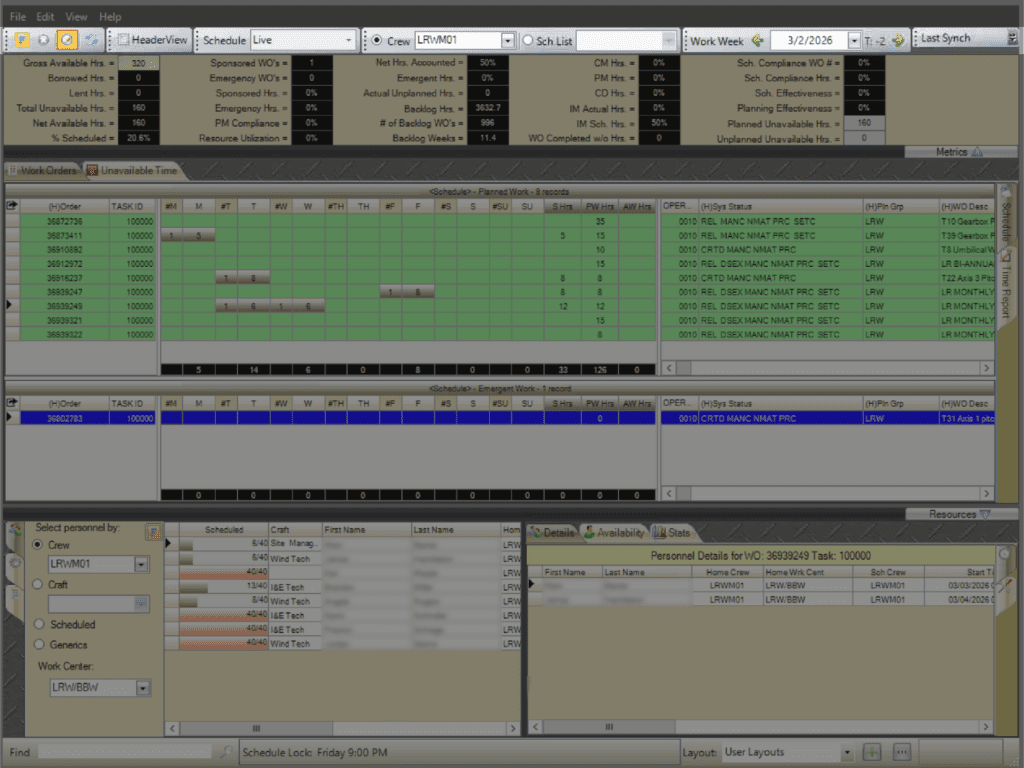
The Toolbar controls how the Work Week Scheduling (WWS) screen is displayed and updated.

- Filter button: Displays the filter bar for filtering grid columns.
- Removes all active filters.
- Toggles the display of the daily columns.
- Refreshes the WWS screen.
- Header view: Collapses the schedule to the work order level. Select + to expand job details.
- Schedule: Defaults to “Live” for all PaSTA users and cannot be changed.
- Crew: Selects the crew to display (enabled by the radio button).
- Sch List: Select a standard view (No Crew or All Scheduled) or custom schedule view.
- Work week: Select the work week to be displayed using the drop down calendar or green arrows.
- Last synch: Displays the date and time of the most recent import from the CMMS.
- Note: When the organization’s setup is Live for near real time data exchange, the Last Synch field will show a default timestamp instead of a valid sync time, as shown in the screenshot above.
Performance Metrics
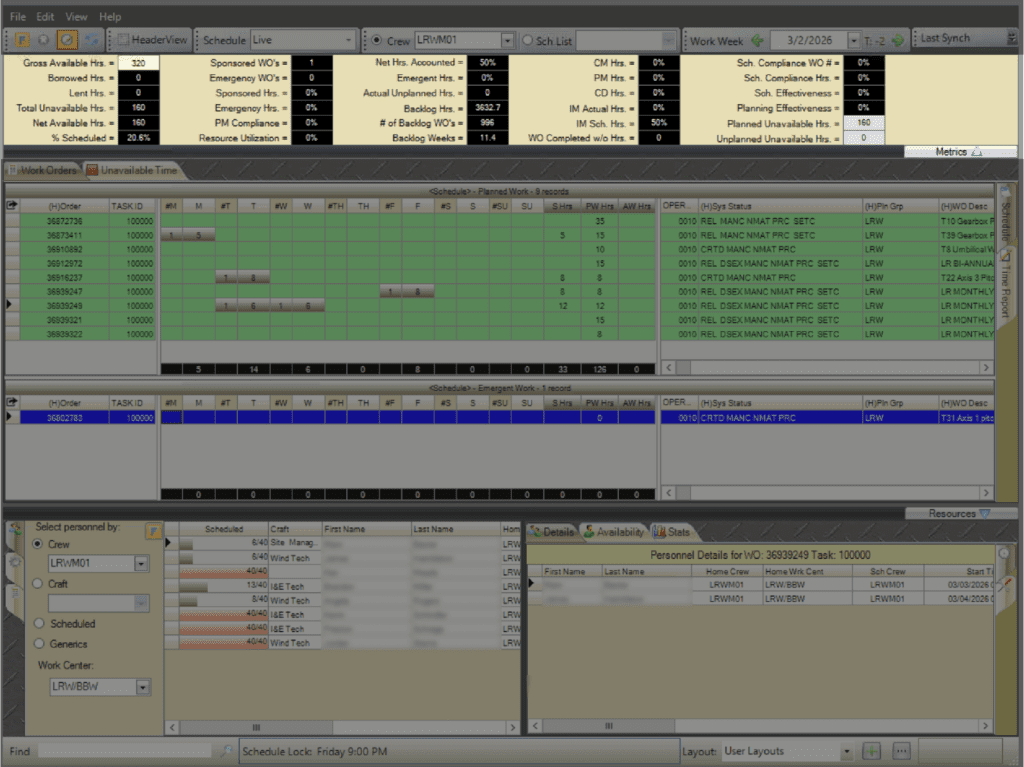
Displays key metrics based on the work orders scheduled for the selected T-week. Select the Metrics button to hide or display the metrics section. Learn more about metrics here.
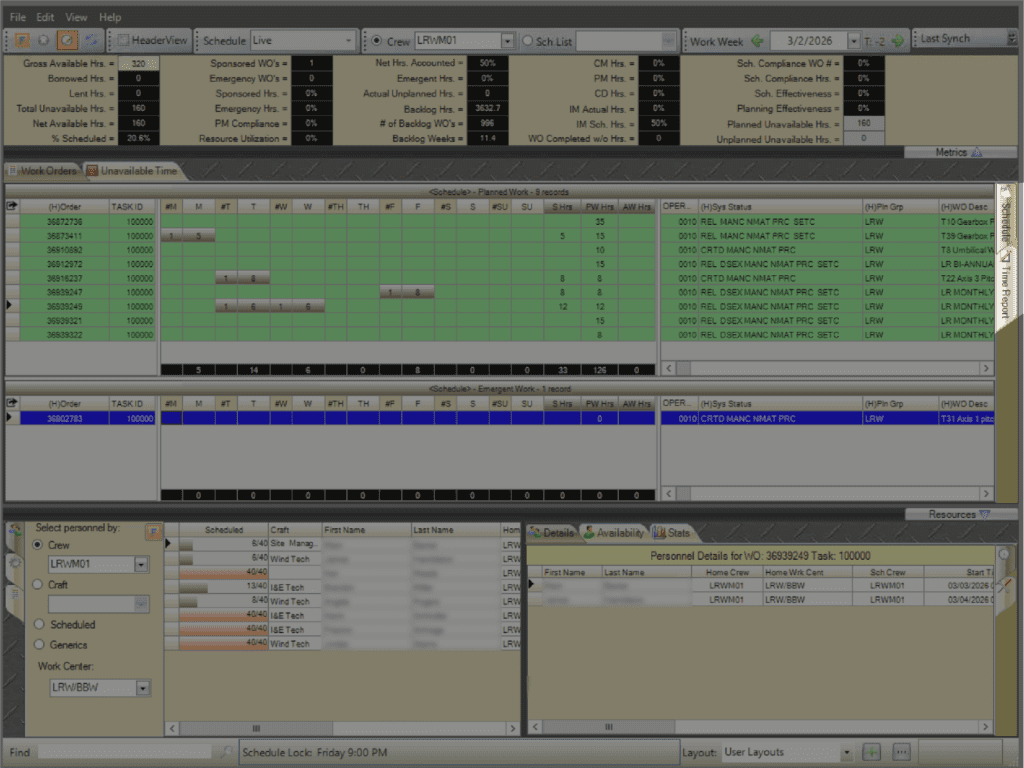
Schedule Planning
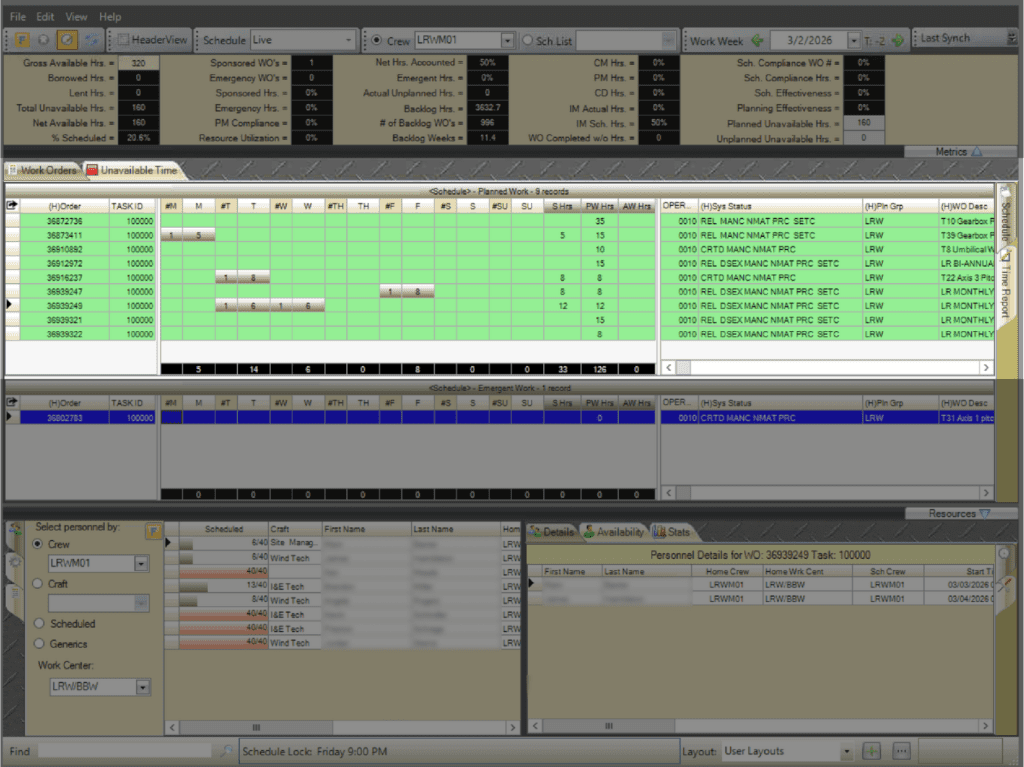
The left side of the Schedule Planning area is where personnel, equipment, and tasks are assigned to work orders for the selected week. The right side of the Schedule Planning area displays work order details.
- #Day: Number of resources assigned for the selected day.
- Day: Total resource-hours scheduled for the selected day.
- S Hrs: Total scheduled hours for the work order.
- PW Hrs: Planned Weekly hours: total planned hours for the work order for the week.
- AW Hrs: Actual Weekly hours: total actual hours recorded for the work order for the week.
- Black bar (bottom row): Displays the summed hours.
Emergency & Sponsored Work Area
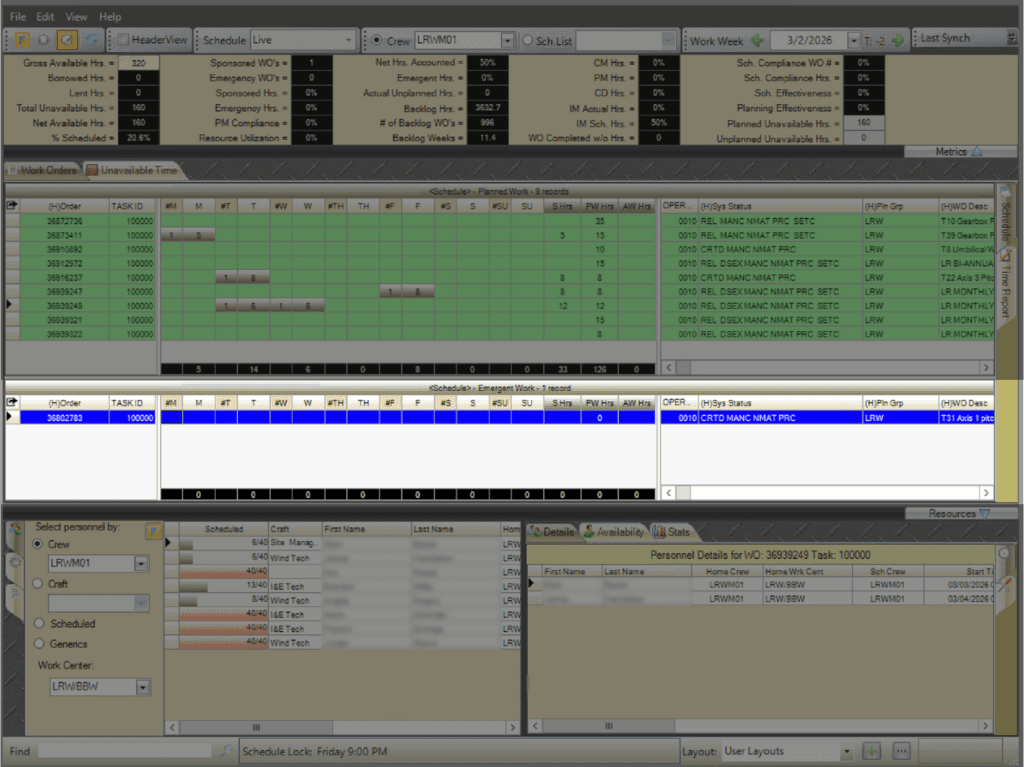
The Emergency & Sponsored Work area is where resources are scheduled to unplanned work that arises after the schedule is locked down.
Unavailable Time
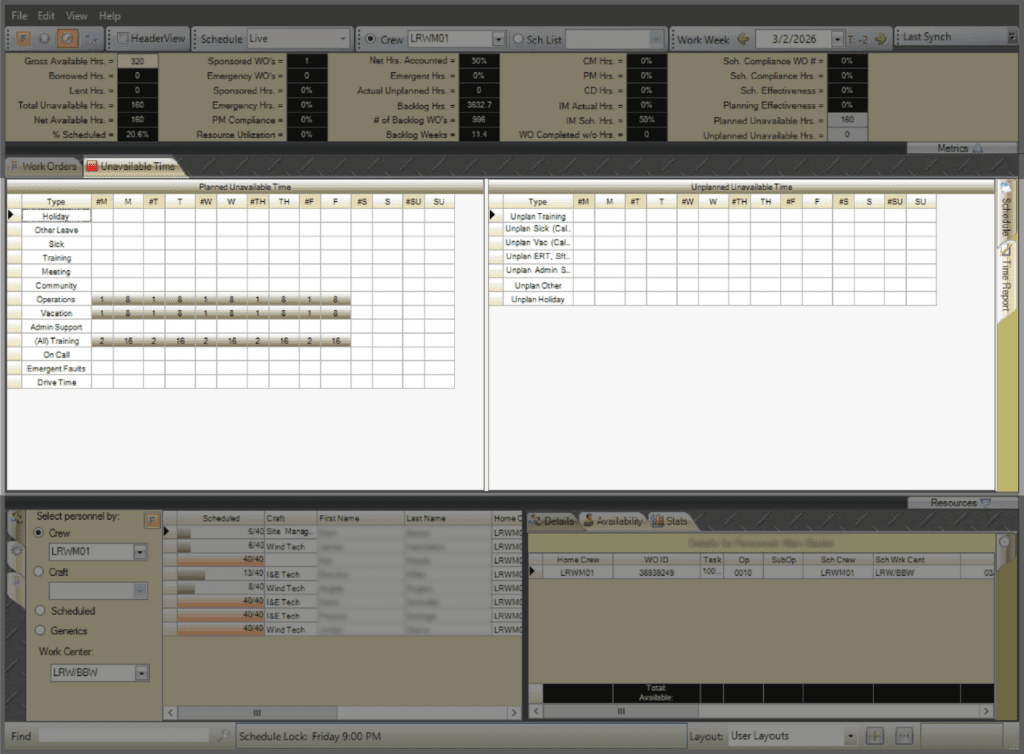
The Unavailable Time tab displays two grids: Planned Unavailable Time and Unplanned Unavailable Time. These grids track hours when personnel are not available for scheduled work.
- Planned Unavailable Time: Used during future T-weeks to record known absences (vacation, training, sick leave, etc.).
- Unplanned Unavailable Time: Used during the current work week (T-0) to record unexpected absences that occur during execution.
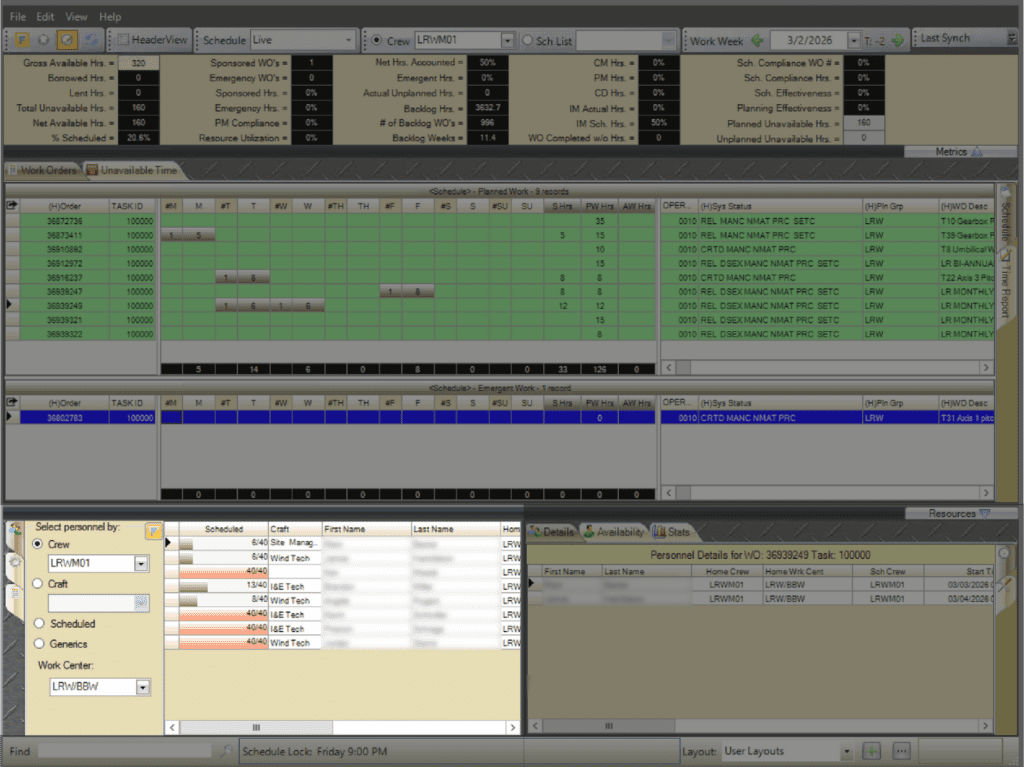
Display Modes
Display Modes control how planned and actual work hours are shown within the schedule grid.
- Schedule tab: Displays scheduled hours for personnel, craft, or generics.
- Time Report tab: View the actual hours applied to the work.
Resources
The Resources Area displays personnel and equipment available for scheduling in the selected week. Resources are scheduled by dragging them onto the appropriate work order and day. There are three tabs in the Resources & Crew Area: Personnel, Equipment, and Tasks.
Personnel Tab
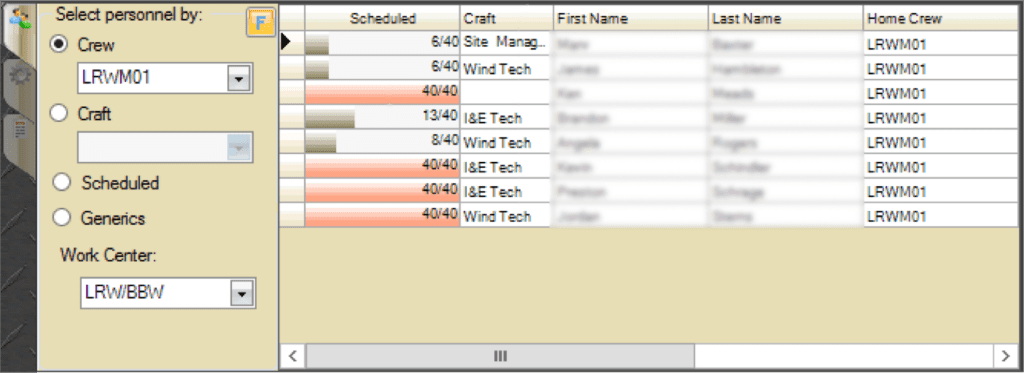
Displays personnel available for scheduling.
- Crew: Displays personnel for the selected crew.
- Craft: Displays personnel by selected craft.
- Scheduled: Displays personnel already scheduled for the week.
- Generics: Displays generic personnel (i.e. mechanic, welder, etc.)
- Work Center: Displays personnel by work center.
Equipment Tab

- Group: Displays equipment by selected group.
- Type: Displays equipment by selected type.
- Scheduled: Displays equipment already scheduled for the week.
Task Tab

- Crew: Displays work orders by crew.
- Craft: Displays work orders by craft.
- Task View List: Selects a WWA Task View List tab to display the corresponding work orders.
- Scheduling details: Displays two additional columns for the Work Week that the task has been applied and the Sch (Scheduled) Crew that has been assigned to do the work.
Personnel Detail & Availability
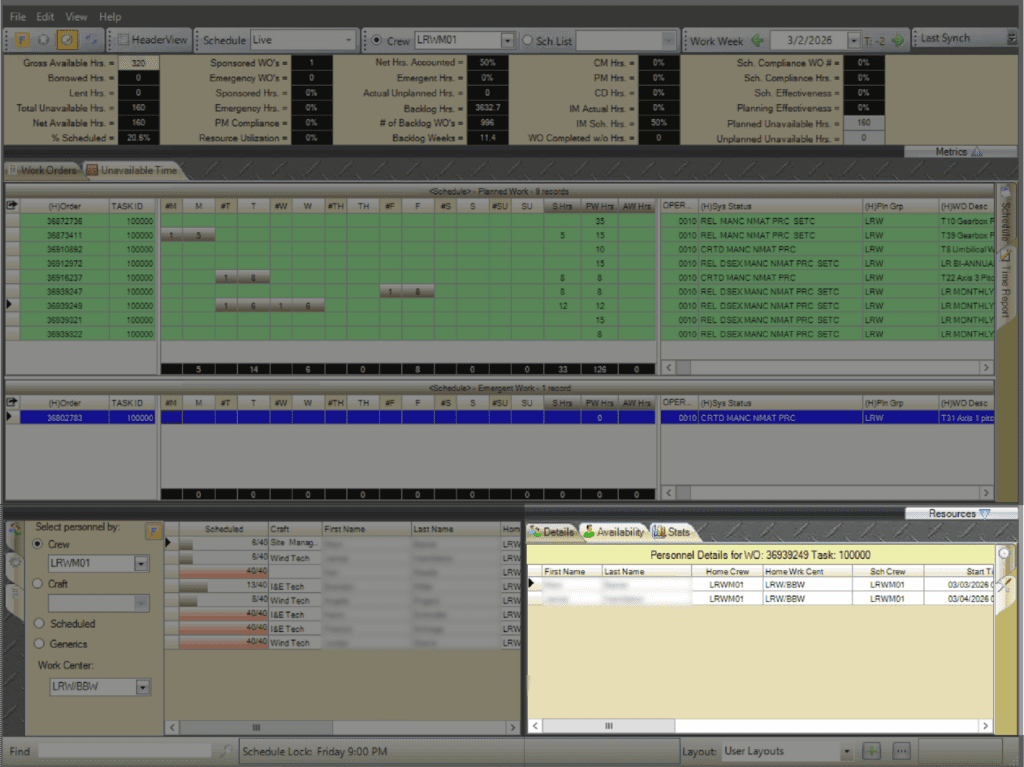
Displays detailed assignment and availability information for personnel associated with the selected work order or work order task. There are 3 tabs in the Personnel Detail & Availability area: Details, Availability, and Stats.
Details Tab
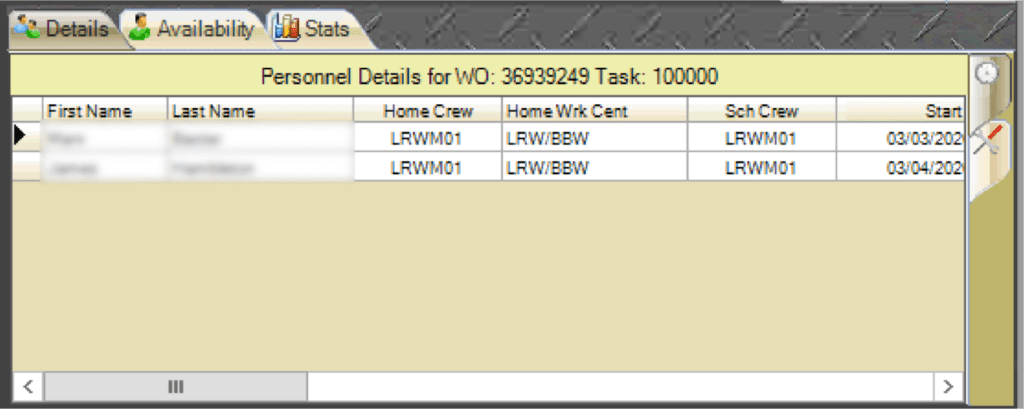
Lists assigned personnel, including crew, start times, and planned hours by day of the week.
Availability Tab

Displays each crew member’s daily availability and scheduled vs. actual hours. This tab is only available when shift patterns have been applied to the personnel.
Stats Tab
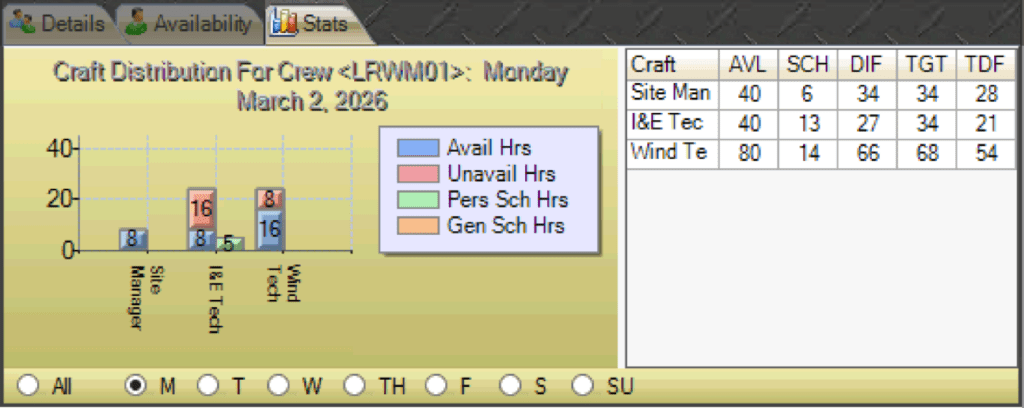
Displays craft distribution for the crew for the week.