Menu

File
- New: Create an internal PaSTA work order (Internal PaSTA work orders are created in PaSTA and are not imported from the CMMS).
- WO Search: Opens the Work Order Search screen to filter and locate specific work orders.
- Print: Export data as a PDF.
- Print Task List: Generate a PDF of the Backlog.
- Print Schedule View (1–4 weeks): Generate a PDF of the displayed T-Weeks.
- Export: Export data to a flat file or clipboard for use in Excel.
- Export Task List: Export the backlog.
- Export Schedule View (1-4 weeks): Export displayed T-weeks.
- Modify Reports: Modify Canned WWA Reports.
- Close: Close the WWA.
Edit
- Reset User Layouts to Default: Resets screen layout to the global default.
- Set User Layouts as Default: Set your layout as the the default for the center (only authorized users).
- Reset Default Layouts for Center: Reset screen layout for the center back to the original defaults (only authorized users).
View
- Show/Hide Multiple Crew Scheduled Indicators: Displays a blue indicator when a task or operation is scheduled to multiple crews. Hover over a work order to view additional details.
Help
- Legend: Displays the WWA color legend.
- Planner not assigned: No planner assigned in PaSTA or through the CMMS interface.
- Planner Assigned. Planning not complete: Planner assigned, but not set to Planning Complete in PaSTA or not in a Planning Complete status in the CMMS.
- Planning Complete. Not Ready to Work: Planning activities complete, but not marked Ready to Work by a supervisor.
- Ready to work: Marked Ready to Work by a supervisor.
- Hold: Job is on hold (LOTO, clearance required, etc).
- Note: Job has a note attached (dog ear symbol).
- Current work week or later: Scheduled in the current or future week.
- Before current work week: Scheduled in a past week.
- Both before and after current work week: Scheduled in both a past and a current or future week.
- On a project: Job is part of a project.
Toolbar
The Toolbar provides basic controls for viewing and updating the WWA.

- Expand/Collapse: Expand or collapse backlog and T-Week screens.
- Refresh: Refreshes the WWA data.
- Schedule: Defaults to “Live” for all PaSTA users and cannot be changed.
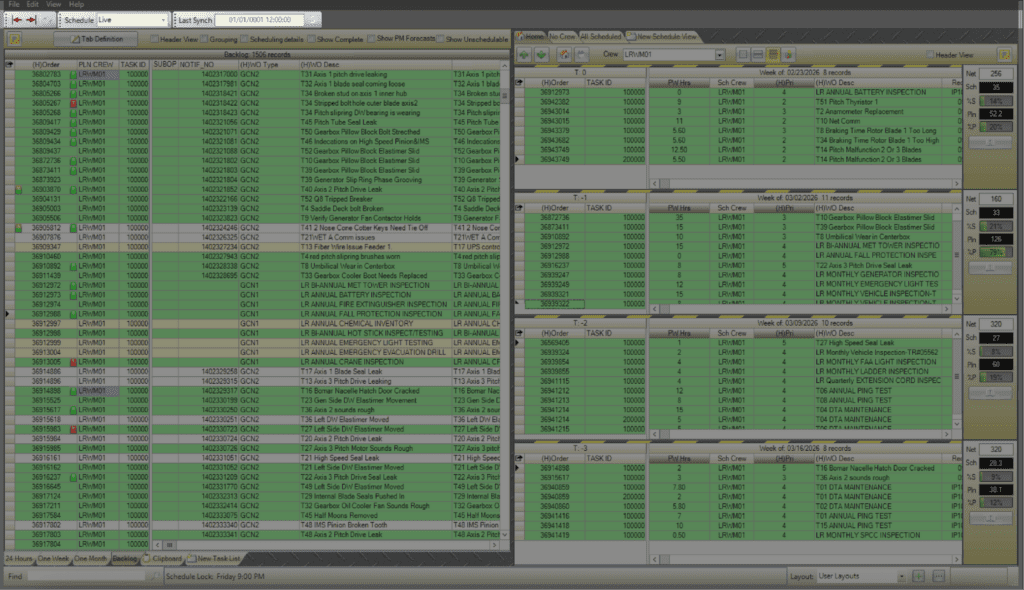
- Last Synch: Displays the date and time of the most recent import from the CMMS.
- Note: When the organization’s setup is live for near real time data exchange, the Last Synch field will show a default timestamp instead of a valid sync time, as shown in the screenshot above.
Backlog Controls
Backlog Controls adjust how work orders are displayed in the backlog.

- Filter: Displays the filter bar for filtering any backlog column.
- Tab definition: Edit the criteria for the task list tab (standard pasta tabs cannot be edited- 24 hours, one week, one month, backlog, clipboard).
- Header View: Collapses the backlog to the work order level. Use the + to expand job details.
- Grouping: Groups backlog data by selected columns. Drag columns into the gray area to group.
- Scheduling Details: Displays two additional columns for the Work Week that the task has been applied and the Sch (Scheduled) Crew that has been assigned to do the work.
- Show Complete: Displays all jobs including completed.
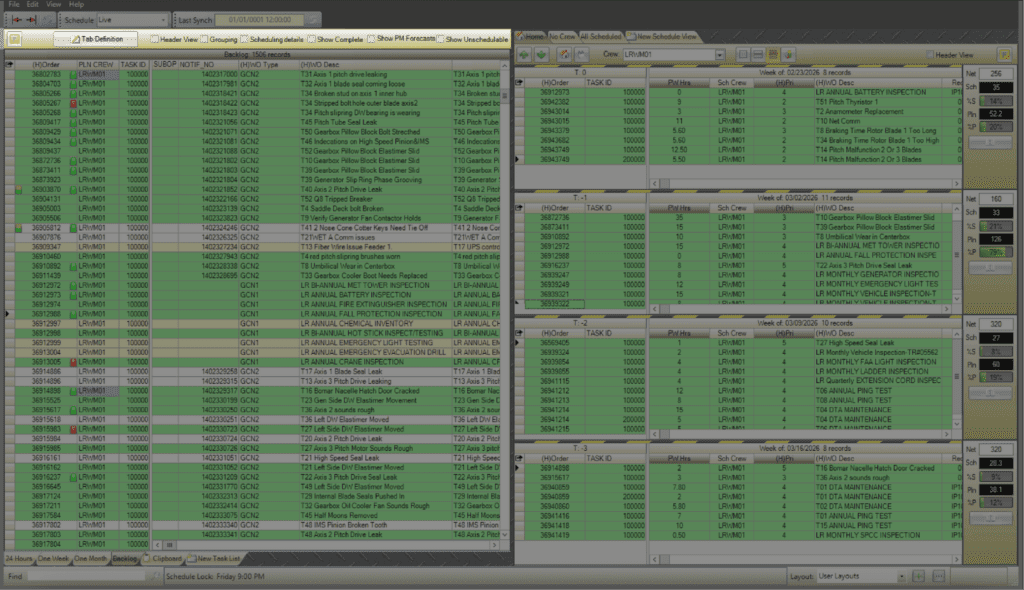
- Show PM Forecasts: Display Preventative Maintenance forecasts.
- Show Unschedulable: Displays all jobs including those that cannot be scheduled based on system rules.
Backlog
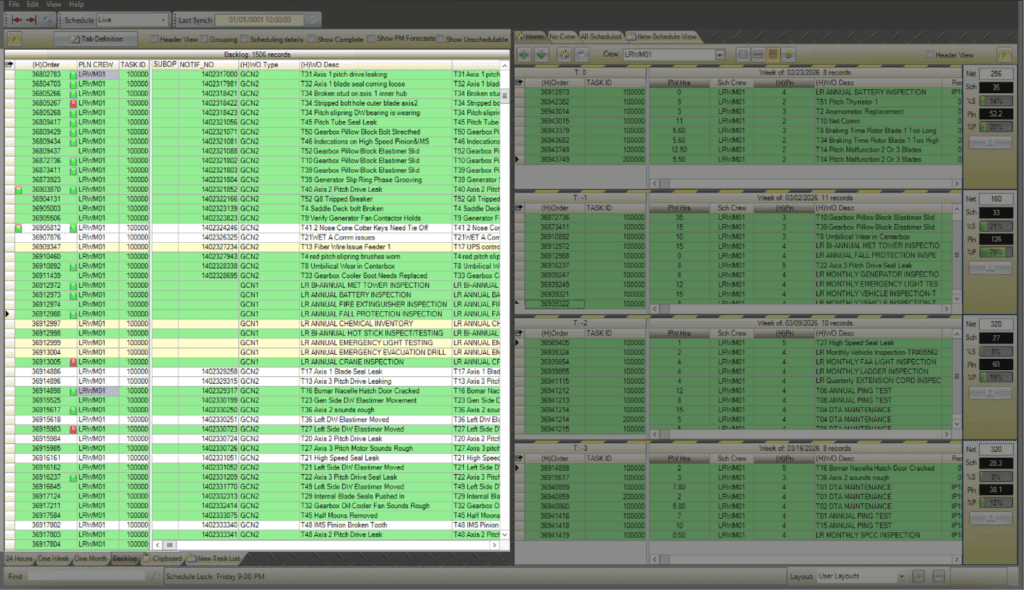
The backlog displays all open work orders imported from the CMMS for scheduling.
Task Lists
A task list (or tab) is a pre-defined way to view only the records in the backlog that are applicable to you. The 24 Hours, One Week, One Month, Backlog and Clipboard task lists are standard to PaSTA and cannot be modified. Select New Task List to create a tab with customized filters and criteria.
- 24 Hours: Jobs created in the past 24 hours.
- One Week: Jobs created in the past week.
- One Month: Jobs created in the past month.
- Backlog: All open jobs.
- Clipboard: Drag and drop jobs from the backlog to the clipboard tab to set them aside.
- New Task List: Create a new custom tab view.
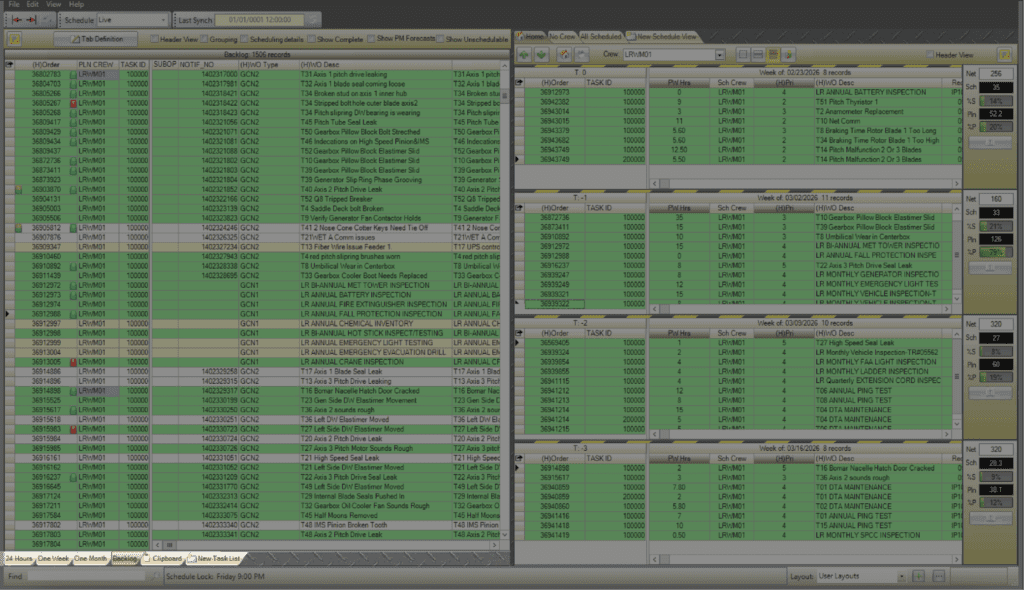
T-Weeks
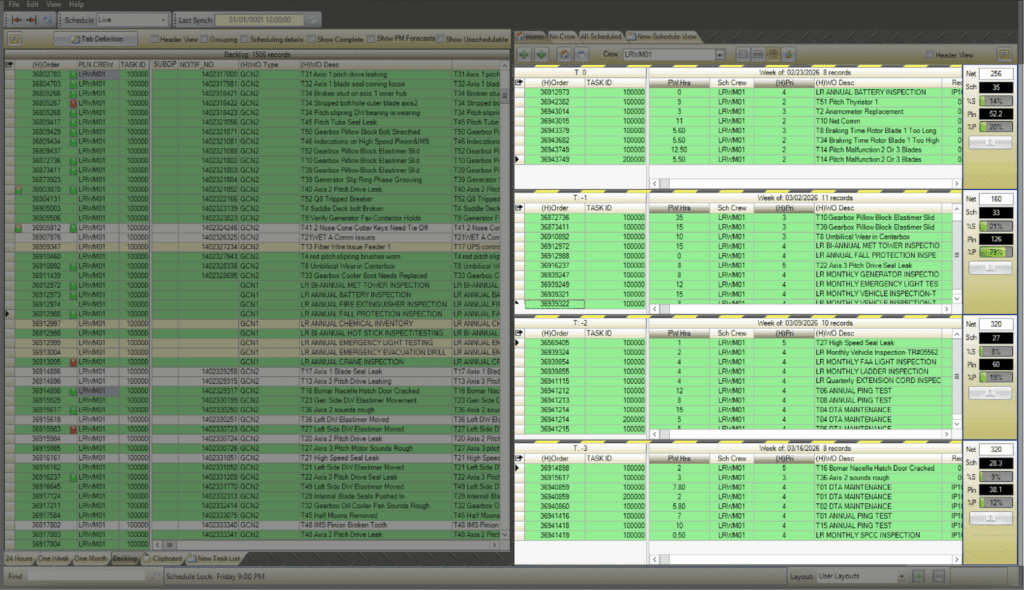
Displays the rolling four-week schedule by crew.
T-Week Controls
T-Week Controls adjust how the rolling four-week schedule is viewed and navigated.

- Move to previous and future weeks.
- Return the display back to T-0.
- Opens the calendar to manually select a work week.
- Crew: Select the applicable crew.
- Display a one week, two week, or four week view.
- Displays the craft distribution for the selected crew by week.
- Header View: Collapses T-Weeks to the work order level.
- Filter: Hides or shows the filter bar.
Schedule Views
Schedule view tabs control how work orders are displayed within the four-week schedule.

- Home: View work orders by crew.
- No Crew: View work orders without an assigned crew.
- All Scheduled: View all scheduled work orders.
- New Schedule View: Create a custom schedule view tab.
Metrics
The Metrics panel provides a quick snapshot of labor hours and scheduling performance for each T-Week.
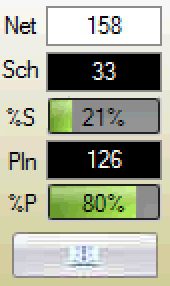
- Net: Net available man hours = Gross available man hours + borrow hours – unavailable hours – lent hours
- Sch: Total scheduled hours = The number of hours in which resources are scheduled to jobs
- %S: Percent scheduled = Scheduled hours / net available man hours
- Pln: Planned hours = Total number of estimated hours for planned jobs
- %P: Percent Planned = Planned hours / net available man hours
- Select the book icon to quickly access the WWS.