Menu

File
- Import: Import projects from Microsoft Project or Primavera into PaSTA.
- Export: Export PaSTA projects to Microsoft Project (.mpp) or Primavera (XML).
- Create New Project from Current Project: Creates a new project based on the selected project, with options to include schedule data or remove work week schedule links.
- Print Gantt: Print the project as a Gantt chart.
- Print Details: Opens a print preview of project details.
- Close: Close the projects screen.
View
- Show Gantt Background Lines: Turn on the display of Gantt background lines on the timeline.
- Hide Gantt Background Lines: Turn off the display of Gantt background lines on the timeline.
Tools
- Project Security: Control which users have access to specific functions within a project.
Toolbar
The Toolbar controls how project data is viewed and managed within the Projects screen.


- Filter: Filter project tasks by crew, percent complete, column names, overdue tasks, and schedule date.
- Expand/Collapse Planned and Work Week area.
- Refresh: Refresh screen data.
- Project: Select the project to display.
- Create a New Project.
- Delete Current Project.
- Monthly/Weekly/Day Views.
- Work Week Data: Toggle display of Work Week Data.
- Collapse/Expand all sections.
- Add/Delete Section.
- Delete Task, Delete Time Item.
- Snap time: Sets the time interval used to align time entries on the timeline. Time entries automatically snap to the selected interval when added or moved.
- Path View/Critical Path:
- Path View: Traces all related predecessor/successor logic ties.
- Critical path: Highlights the longest sequence of dependent tasks that determines the project duration. Delays to these tasks will delay the entire project.
- Find: Search for items in the project.
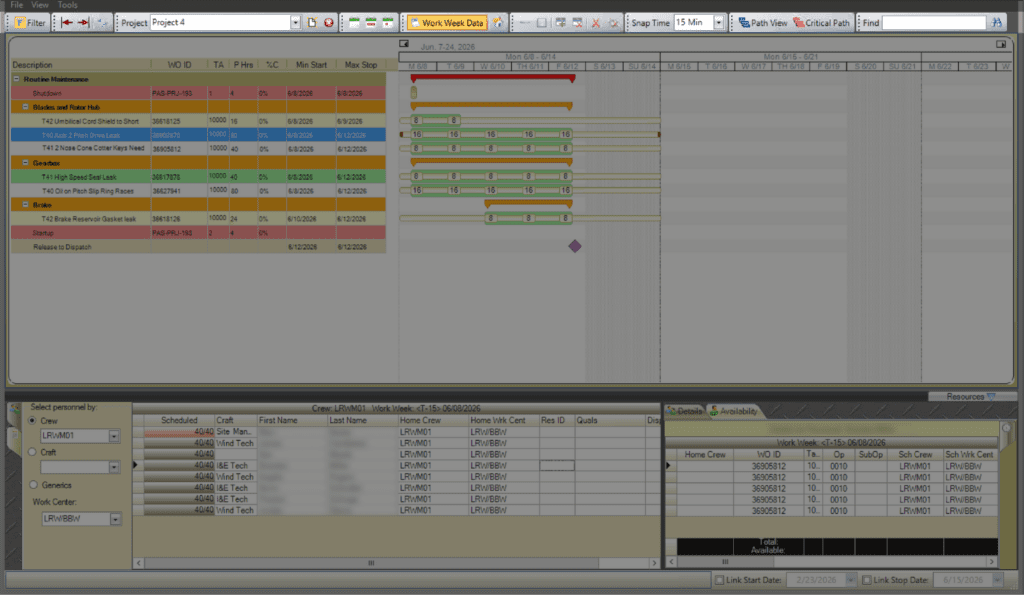
Project Task Grid

The Project Task Grid lists and organizes all tasks within a project. From here, tasks can be added, arranged, grouped into sections, and updated as plans evolve.
This grid forms the foundation of the project schedule — everything shown on the timeline originates here.
Project Timeline

The Project Timeline area displays project tasks on a visual timeline, showing duration and relationships between tasks.
Resources

The Resource Management area is where work orders and personnel are added to the project. There are two tabs in the resources area: Personnel and Tasks.
Personnel Tab
Displays personnel available for assignment. Use filters to narrow results by:
- Crew: Displays personnel for the selected crew.
- Craft: Displays personnel by selected craft.
- Generics: Displays generic crafts.
- Work Center: Displays personnel by work center.
Task Tab
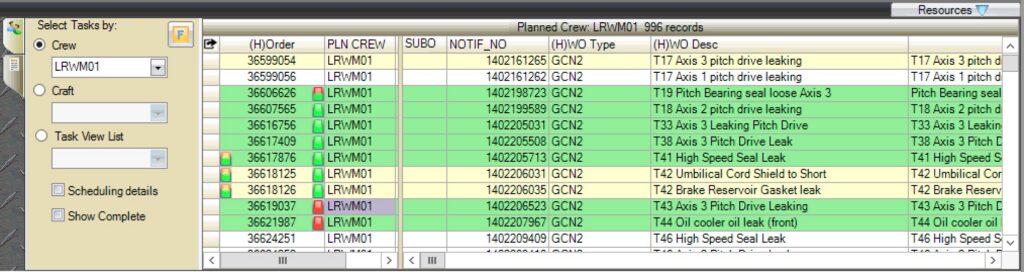
Displays work orders available to add to the project. Filter by:
- Crew: Displays work orders by crew.
- Craft: Displays work orders by craft.
- Task View List: Selects a WWA Task View List tab to display the corresponding work orders.
- Scheduling Details: Displays two additional columns for the Work Week that the task has been applied and the Sch (Scheduled) Crew that has been assigned to do the work.
- Show Complete: Displays all jobs including completed.
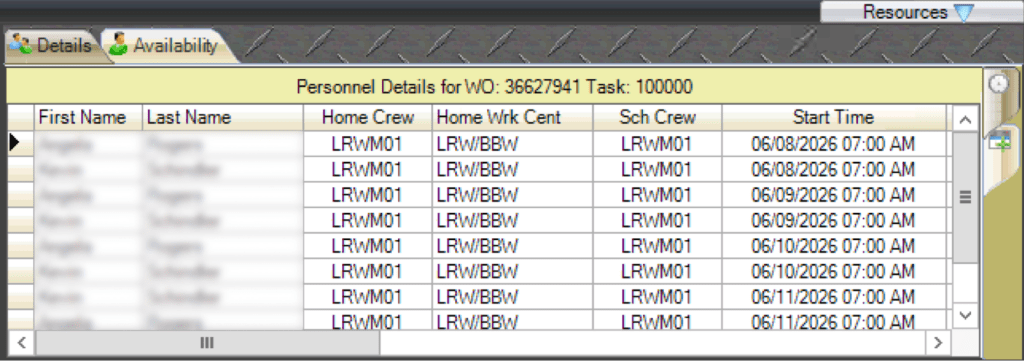
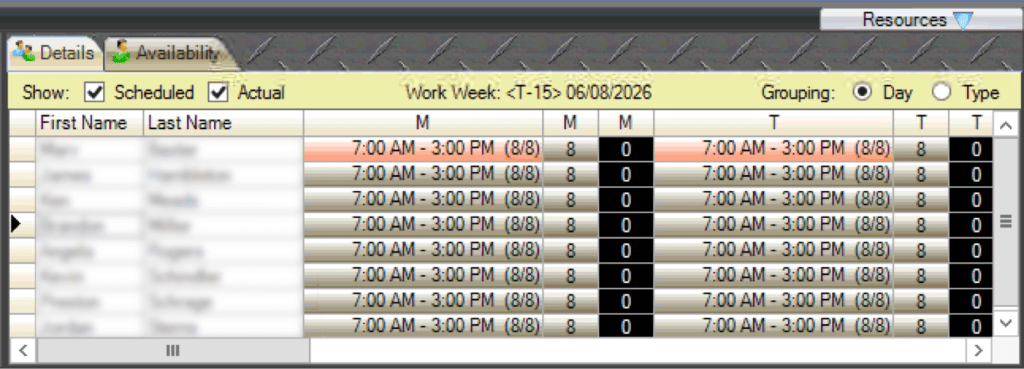
Personnel Detail & Availability
Provides visibility into personnel assigned to project work. There are two tabs in the Personnel Detail & Availability area: Details and Availability.
Details Tab
Lists assigned personnel, including crew, start times, and planned hours by day of the week.
Availability Tab
Displays each crew member’s daily availability and scheduled vs. actual hours.